

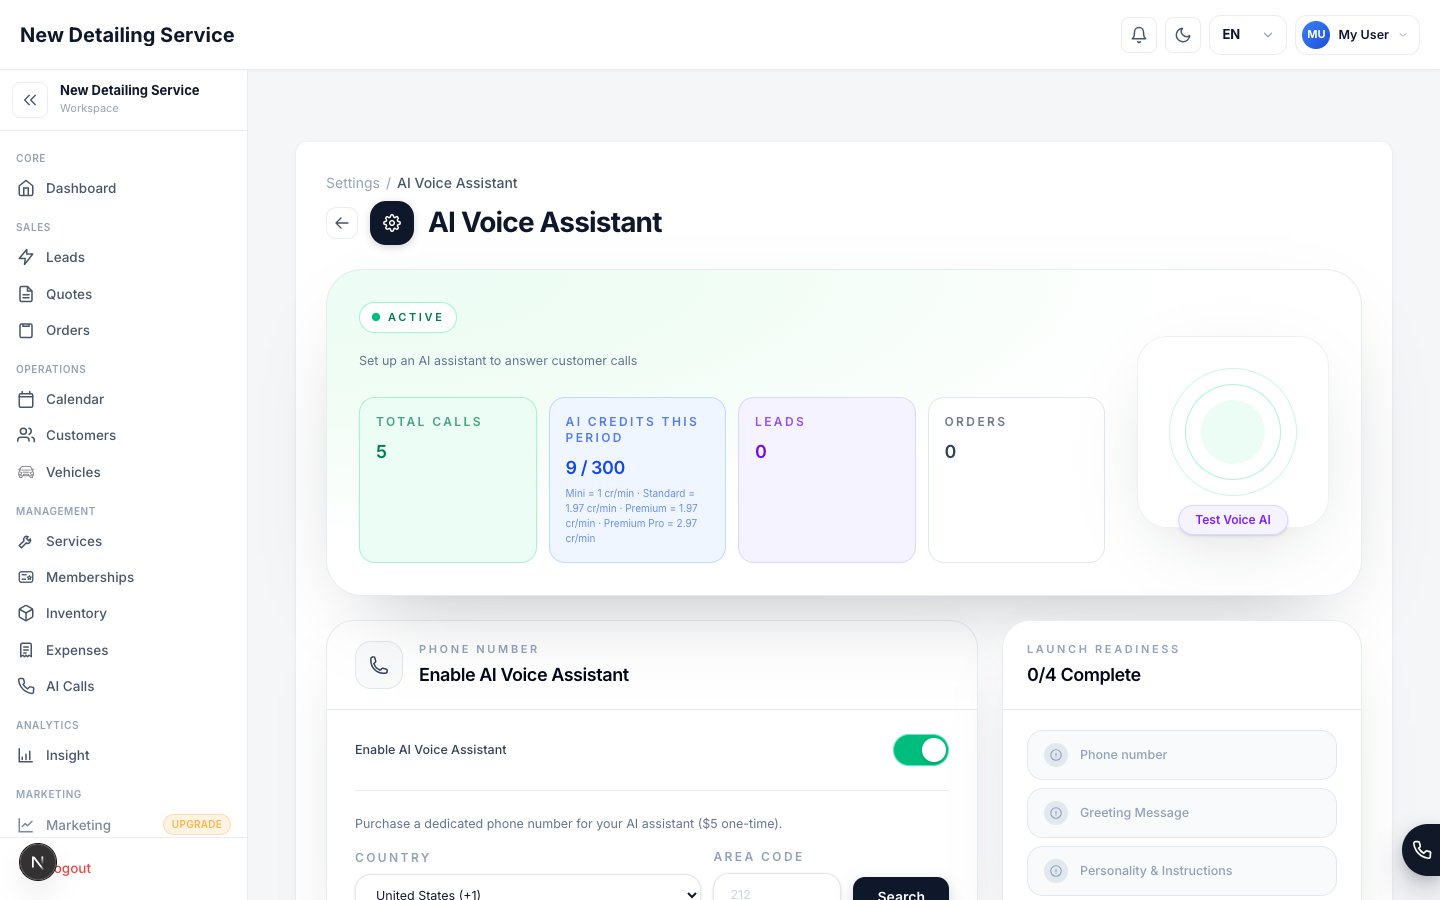
AI Voice Assistant settings — enable the assistant, review usage, and configure call behavior before going live.
What the assistant can do
You choose which actions are enabled. If you only want the assistant to capture leads and never create orders directly, you can configure it that way.
Setup
1
Enable the assistant
Go to Settings → AI Voice Assistant and toggle the assistant on. You’ll be prompted to set up a phone number if you haven’t already.
2
Get a phone number
The assistant needs a dedicated phone number to receive calls. You can:
- Search for a number — find a local number by area code or country
- Purchase and provision — the CRM configures the phone number for the assistant
3
Choose voice and model
Select the AI voice and model tier:Voices available: alloy, ash, ballad, coral, echo, sage, shimmer, verse — each with a distinct character and tone. Listen to samples and choose the one that matches your brand.Model tiers — higher tiers handle more complex calls but use more AI credits per minute:
- Standard — the most cost-efficient option, best for straightforward call flows
- Premium — stronger reasoning for more involved questions
- Premium Pro — the most capable tier for complex calls and edge cases
4
Write the greeting and personality
Greeting message: What the assistant says when it picks up. Keep it short, professional, and on-brand.Example: “Thank you for calling Elite Auto Spa. I’m your AI assistant. How can I help you today?”Personality instructions: A description of how the assistant should behave. This is your system prompt — be specific about tone, what the assistant should and shouldn’t discuss, and any important details about your business.Example: “You’re a helpful assistant for a premium mobile detailing business. Be polite and professional. Focus on booking services. If asked about pricing, always mention that prices depend on the vehicle size. Do not discuss competitor businesses.”The prompt controls how the assistant speaks and handles the conversation. It cannot override service hours, capacity, qualifications, calendar conflicts, or unavailable appointment times.
5
Configure allowed actions
Check or uncheck each action to control what the assistant can do. Start conservatively — enable create_lead, lookup_services, and transfer_to_human first. Once you’re confident in the assistant’s performance, enable additional actions like create_order or check_availability.
6
Review shared booking availability
Open Settings → Scheduling & Availability and confirm AI booking shows Ready. The assistant uses these shared hours and capacity rules when it offers appointments. These hours do not control when the assistant answers calls.
7
Set call duration limit and transfer number
- Max call duration — limits how long a single call can run (60 to 1,800 seconds). Set this based on your typical call length.
- Transfer phone — the number to send calls to when the caller asks for a human or when the assistant can’t resolve the request.
Marking services as AI-sellable
The assistant can offer only services marked AI Sellable. Before going live:- Go to Settings → AI Voice Assistant → Available Services.
- Enable each service you want the assistant to offer.
- Review its price and duration under Settings → Services & Pricing.
Shared availability
When the assistant checks a time, it receives the same valid offers as Online Booking. Business Hours, lead time, advance window, buffers, staff qualifications, physical resources, existing orders, temporary holds, and Google Calendar conflicts all apply. See Scheduling & Availability for the complete rules.How leads and orders are created
When the assistant captures a caller’s information:- Create lead — creates a lead with the caller’s details and preferred time. The time is not reserved after submission.
- Create order — performs a final availability check, creates a scheduled order, and reserves the time.
Usage and billing
The AI Assistant page shows your current usage:- Total calls handled
- Total minutes used
- Leads created by the assistant
- Orders created by the assistant
Wondering what the AI does with call information — what’s stored, who can see it, and whether your data trains AI models? See AI & Call Data in the Trust Center for the full, plain-English answer.
Services & Pricing
Mark services as AI Sellable so the assistant can quote them on calls.
Scheduling & Availability
Configure the hours, capacity, resources, and conflicts used by AI booking.
Leads
Review and convert the leads the AI assistant captures from calls.
Text Notifications
Configure appointment reminders and review-request texts separately from AI Voice.
AI Call History
Review every call the assistant handled.
AI & Call Data
What’s stored, who can see it, and AI limits.